Before diving into building ML workflows, it’s essential to set up your Azure Machine Learning workspace. The workspace is the central environment where all your machine learning resources—datasets, experiments, models, and pipelines—are managed.
Before diving into ML workflows, create your Azure Machine Learning workspace. This hub is the central environment where all your datasets, experiments, models, and pipelines are managed. In this section, we’ll guide you through the steps to create an Azure ML workspace, with visual aids to make the process straightforward.
Step 1: Navigate to the Azure portal.
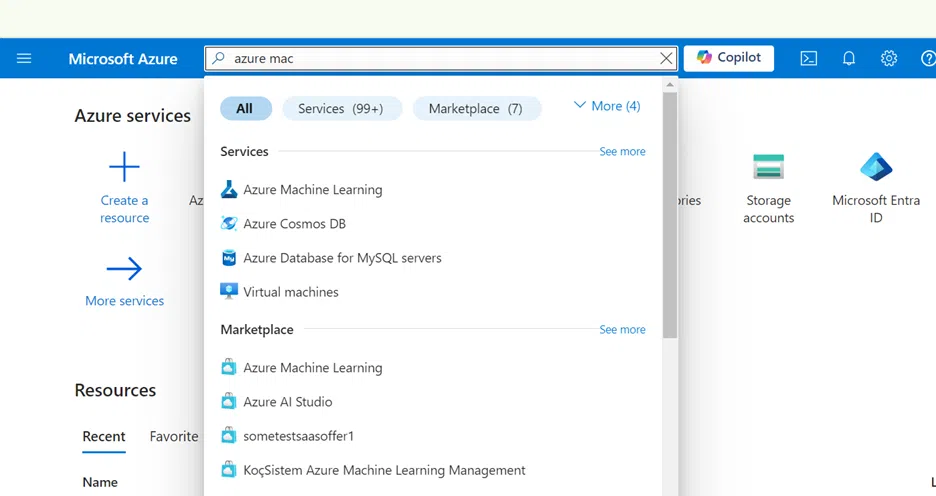
Step 2: In the search bar at the top, type “Azure Machine Learning” and select it from the dropdown options.
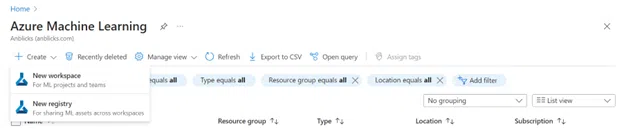
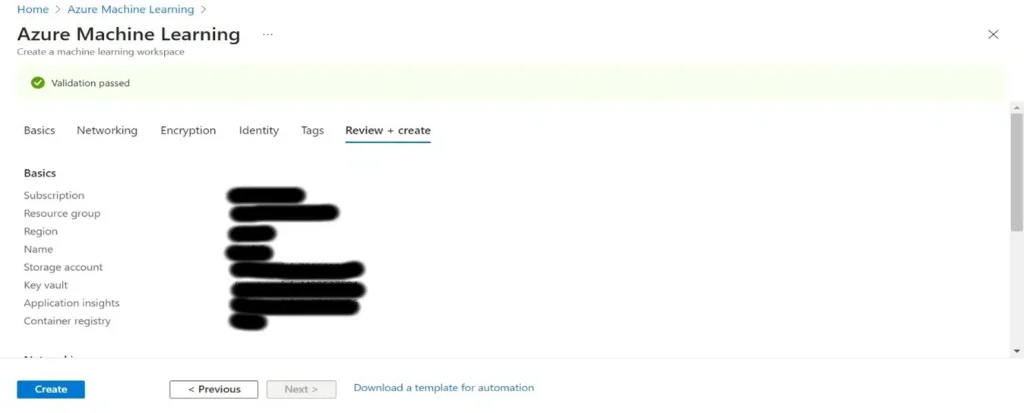
Step 3: Click the “Create” button and select “New Workspace” on the Azure Machine Learning screen. This will start the process of setting up a new workspace.
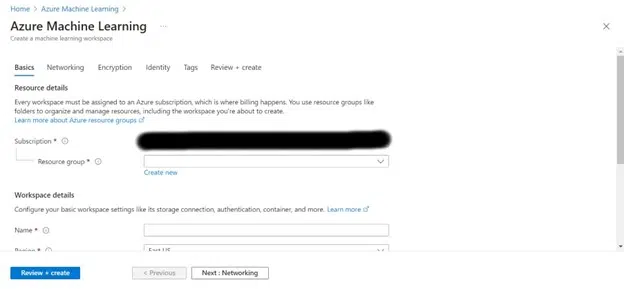
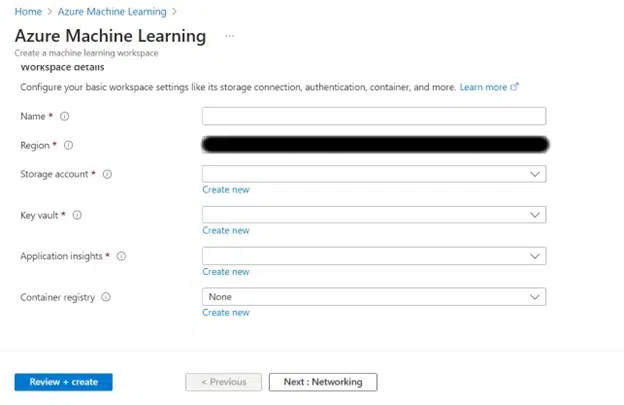
Step 4: In the “Basics” tab, select your subscription and resource group. Then, give your workspace a name and choose a region closest to your location. You can leave the other options as default or customize as necessary.
With your Azure ML workspace ready, configure compute resources and register your data:
- Compute Resources: Create a compute instance for your development environment.
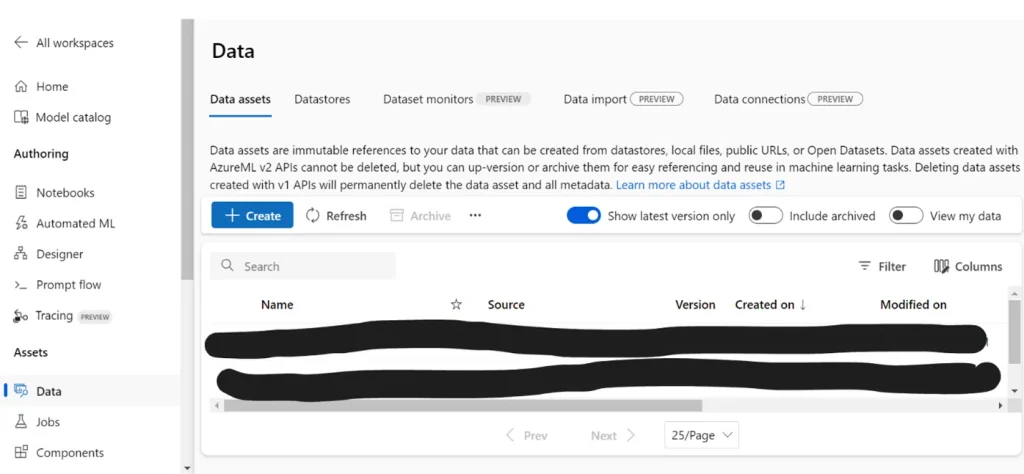
- Data Registration: Upload and register your data using Azure ML’s support for various data sources.
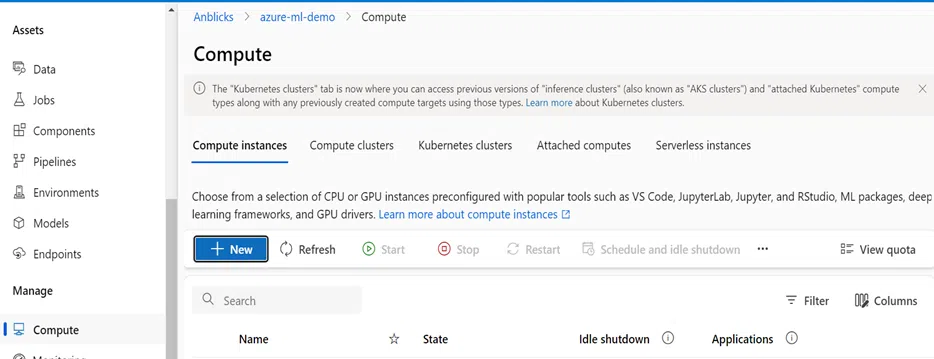
Step 1: Go to the “Compute” section in your Azure ML workspace. Create a new compute instance by selecting the appropriate size and configuration based on your requirements. This instance will serve as your development environment.
Prebuilt components in Azure Machine Learning offer a quick and efficient way to build and deploy machine learning models. These components are designed to handle common tasks like data preparation, model training, and evaluation without the need for extensive coding. Whether you’re a beginner or an experienced data engineer, prebuilt components can streamline your workflow and reduce development time.
Building a Pipeline:
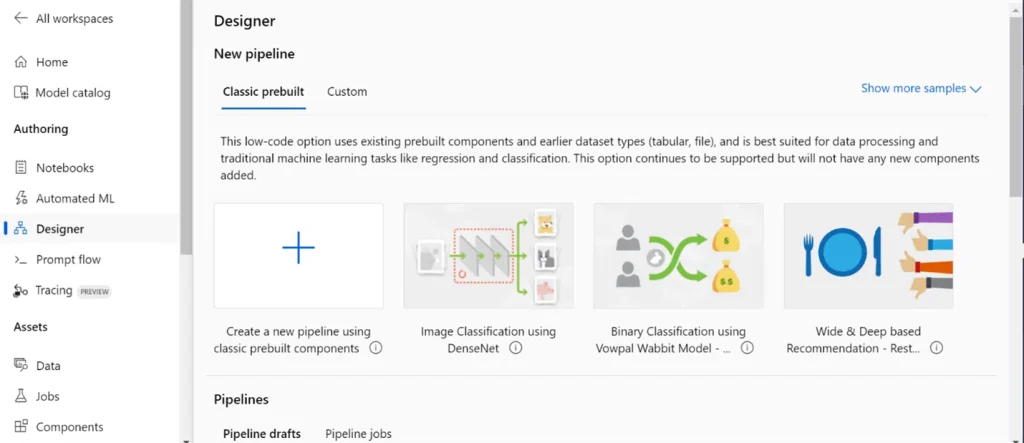
Step 1: Navigate to the Azure ML Designer:
- In the Azure ML workspace, select the “Designer” option from the left-hand menu.
- Once in the Designer, click on “+ New pipeline” to start building a new workflow.

Step 2: Build and run the pipeline:
- After selecting your data source, you can drag and drop the components for data preparation (e.g., “Clean Missing Data,” “Select columns in Dataset,” etc.), model training (e.g., “Two-Class Logistic Regression”), and evaluation (“Evaluate Model”) onto the canvas.
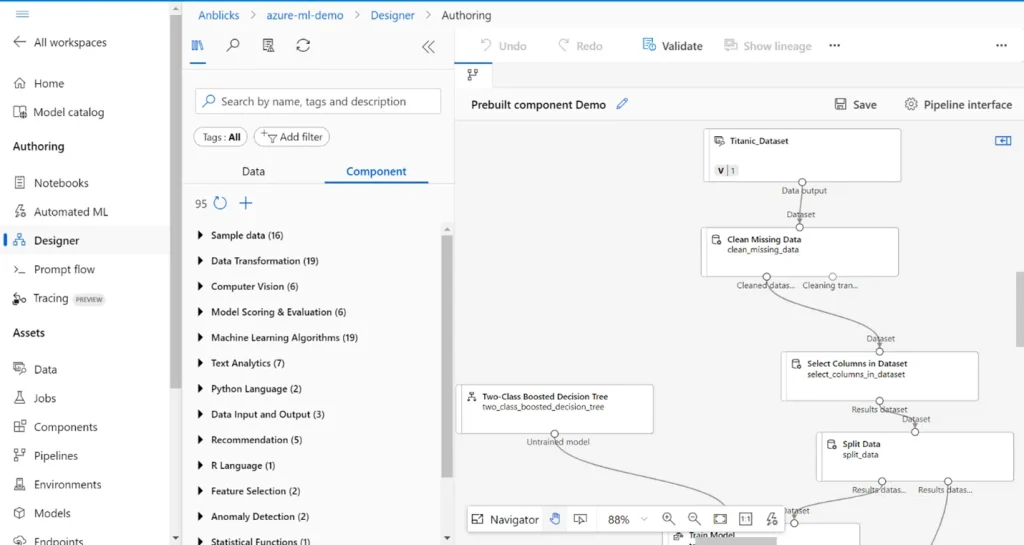
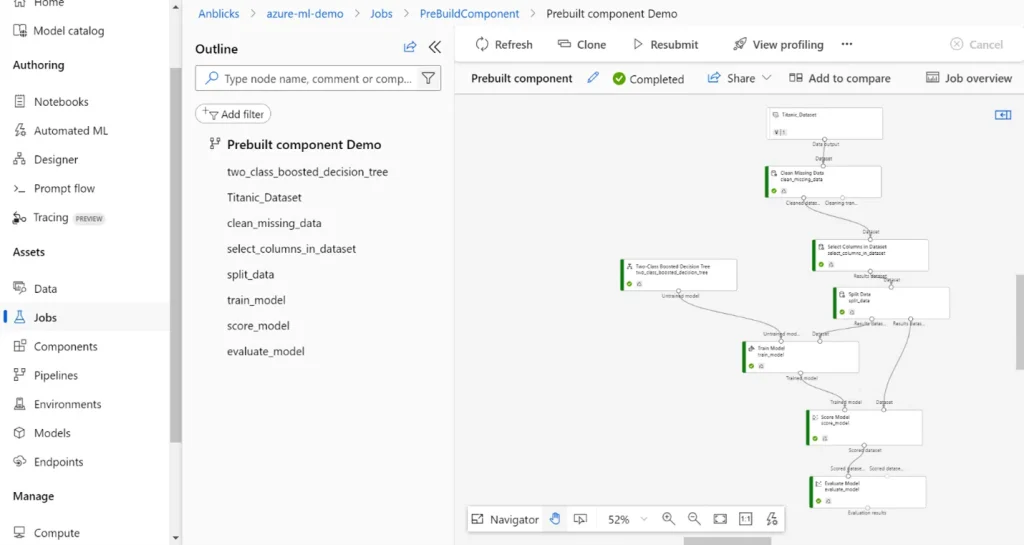
- Once all components are connected, click “Configure & Submit” and select the “Compute resource” to run the pipeline and monitor the results. After submitting the pipeline job, there will be a message on the top with a link to the job detail. You can select this link to review the job details.
![]()

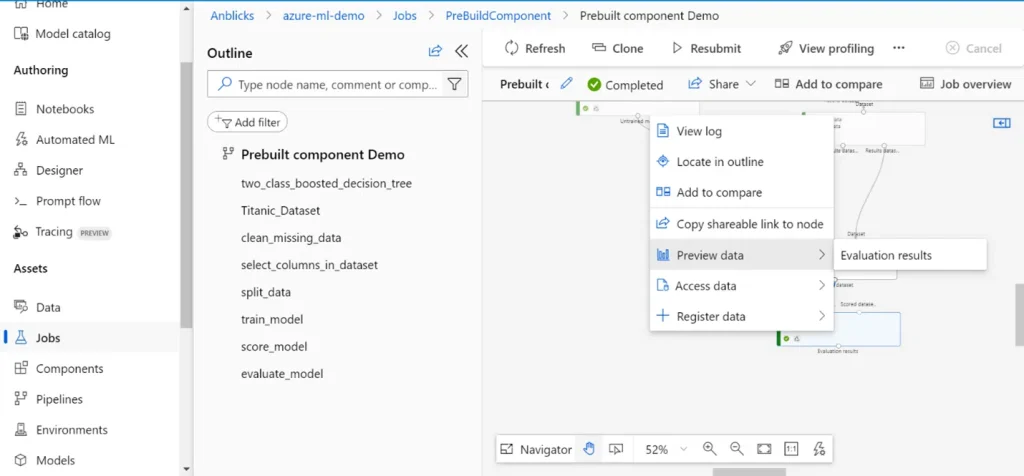
- Right-click on any component in the canvas and select “Preview Data” to view intermediate results or data outputs. This feature lets you inspect the data transformations, model outputs, or evaluation metrics directly in the Designer, helping you quickly validate each step of your pipeline.
Customizing with Custom Components
For advanced ML workflows, create custom components. Azure Machine Learning supports three methods for building pipelines based on your skill set and preferences:
- Python SDK v2: The Python SDK v2 is a robust, code-first approach that offers complete flexibility in defining, customizing, and executing complex ML workflows. It’s ideal for data scientists and engineers who prefer working in a coding environment, where precise control and advanced customization are crucial.
- CLI v2: The CLI v2 provides a command-line interface that uses YAML files to define ML pipelines. It’s ideal for integrating into CI/CD workflows or automating tasks through scripts. The CLI is a straightforward, text-based solution for users looking to automate their ML processes seamlessly.
- UI (Azure ML Designer): For users who prefer a visual, code-free approach, the Azure ML Designer offers a drag-and-drop interface to build pipelines. This UI-driven method is accessible to all skill levels, making it easy to prototype and iterate on workflows quickly without writing any code.
These components provide enhanced flexibility and customization, allowing you to tailor your ML workflows to specific needs and requirements.
Setup the Development Environment
Step 1: Navigate to the Notebooks section in your Azure Machine Learning workspace. Here, you’ll upload the necessary files for building your ML pipeline using the Python SDK v2. These files will include your data preparation script, training script, and any supporting configuration files like the environment YAML file.
Step 2: To get started, clone the repository containing these scripts using the following command:
git clone –depth 1 https://github.com/Azure/azureml-examples
Step 3: After cloning, navigate to the appropriate directory:
Step 4: Once you have the files, upload them into the Notebooks section of your Azure Machine Learning workspace. These should include your prep, train, and score folders, and any environment configuration files.
With everything uploaded, you’re now ready to build and run your pipeline directly from the Azure Machine Learning environment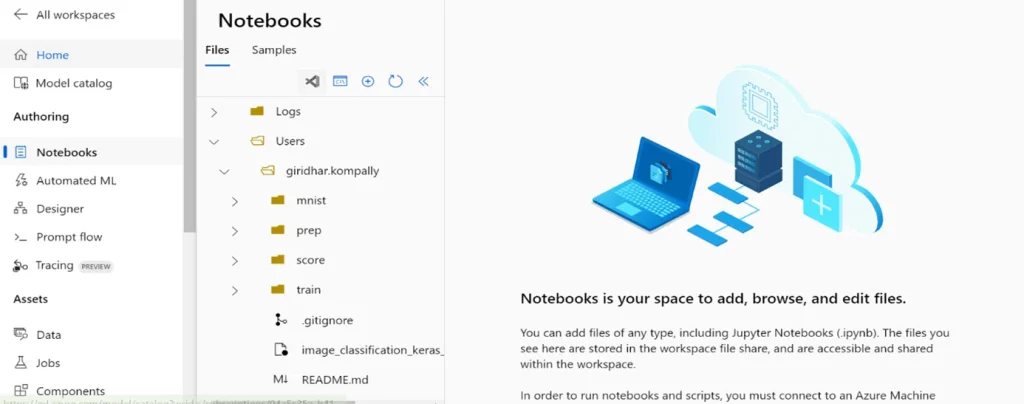
With the files uploaded to the Notebooks section in your Azure Machine Learning workspace, you’re ready to start creating and running your pipeline. Follow these steps to set up and execute your ML pipeline using a Jupyter notebook.
After cloning the repository, you will find a file named“image_classification_keras_minist_convnet.ipynb.” This Jupyter Notebook contains the code required to build and run the machine learning pipeline.
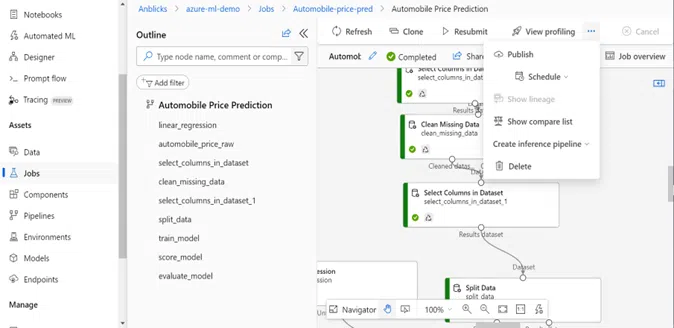
Step 1: After clicking on “Configure + Submit,” as shown in the prebuilt components section, navigate to the Jobs tab to view the submitted job. The image below illustrates the ”Publish” button; click on it to set up and publish the pipeline.
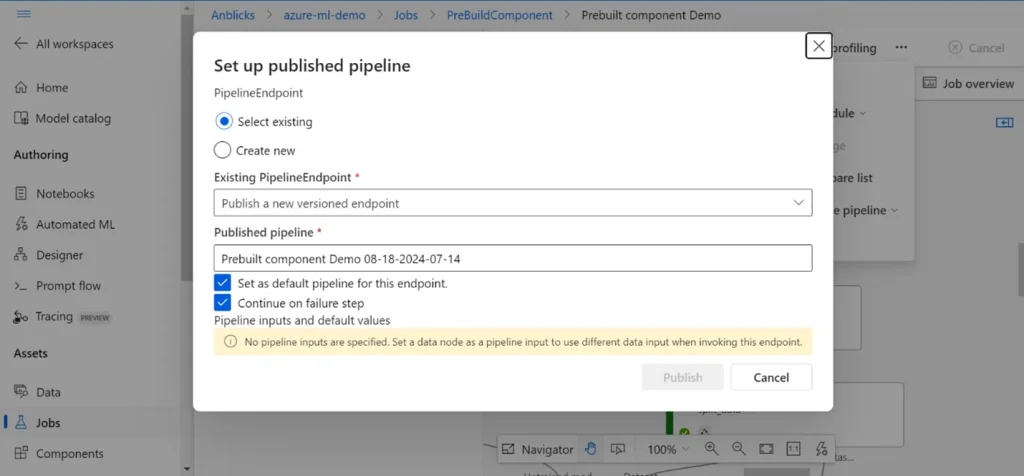
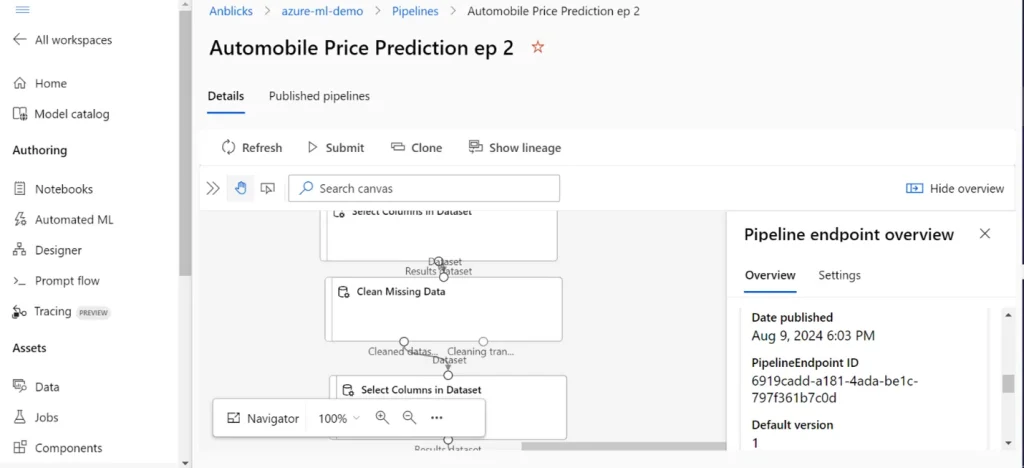
Step 2: After publishing the pipeline, go to the Pipeline Endpoints section. Here, you will find the pipeline endpoint, which you can use in Azure Data Factory (ADF) for integration. The image below shows the pipeline endpoint that can be utilized in your ADF setup.
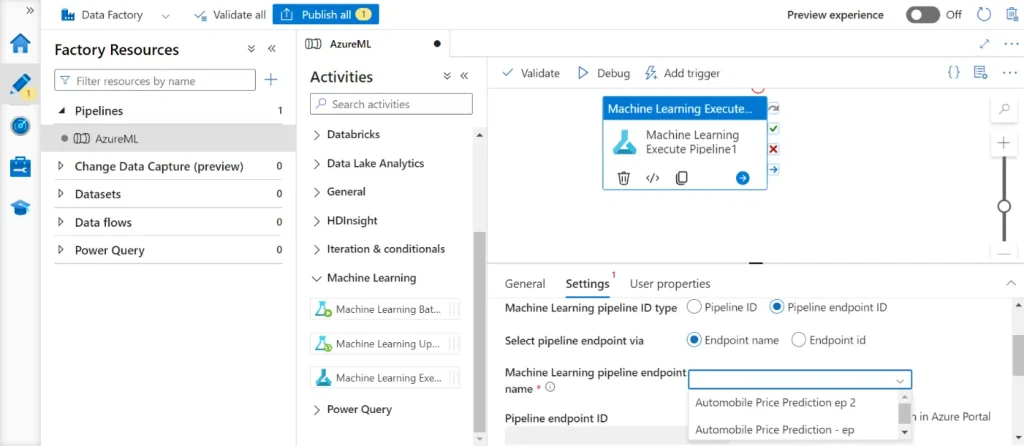
Step 3: Create a new Data Factory pipeline, drag the Azure Machine Learning Execution Pipeline activity onto the canvas, configure it with your Azure ML pipeline endpoint, publish your changes, and then trigger the pipeline.
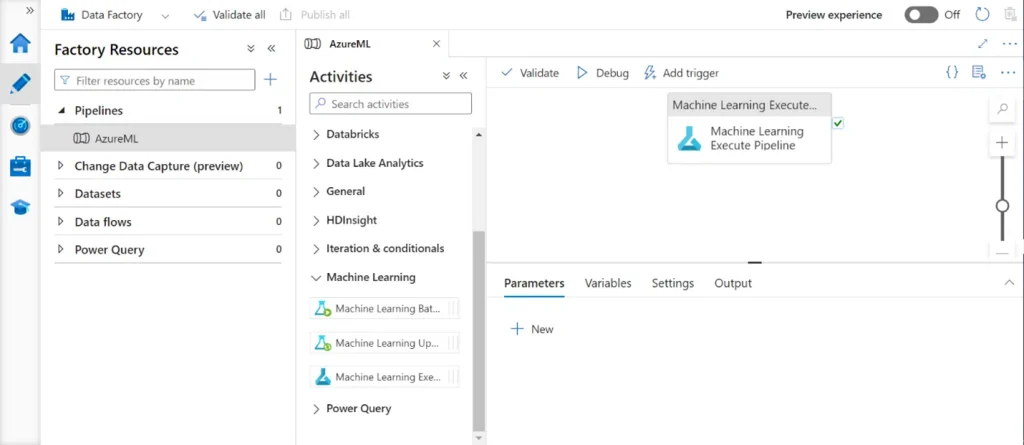
Step 4: Click on the activity settings and choose the Azure Linked Service. In the “Machine Learning pipeline ID” type select “Pipeline endpoint ID.” For “Select pipeline endpoint via,” choose “Endpoint name.” In the “Machine Learning pipeline endpoint name” dropdown, select the appropriate published pipeline endpoint.
Step 5: Click on “Validate” and then “Debug” to run the pipeline. This will execute the ML activity end-to-end based on the selected pipeline ID.
Azure Machine Learning empowers you to optimize ML workflows efficiently. By leveraging these tools and techniques, you can enhance the efficiency, scalability, and flexibility of your machine learning projects. Whether you prefer a code-driven approach with the Python SDK or a more intuitive, drag-and-drop interface with the designer UI, Azure Machine Learning offers powerful capabilities to support your needs. Integrating these workflows into Azure Data Factory further amplifies the automation and orchestration of your ML pipelines, making it easier to manage and scale your solutions.
Want to learn more about how Anblicks can help you optimize your ML workflows with Azure Machine Learning? Our experts can provide tailored guidance and support. Contact us today to schedule a free consultation!